In this practice, you install and then start the Recovery Console, and you look at Help
to determine which commands are available in the Recovery Console. You also use the
Listsvc command to view the services, and then use the Disable command to disable
the Server service. Complete Exercises 1, 2, and 3.
Exercise 1: Installing the Windows XP Professional Recovery Console
In this exercise, you install the Recovery Console.
1. Log on as Administrator.
2. Insert the Windows XP Professional CD into the CD-ROM drive.
3. When the Windows XP Professional CD splash screen appears, close it.
4. From the Start menu, click Run.
5. In the Run dialog box, type :\i386\winnt32 /cmdcons (where
represents the letter assigned to your CD-ROM drive), and then click
OK.
Security Alert If you have installed Windows XP Service Pack 2 on your computer, you cannot
install the Recovery Console. Instead, you must run the Recovery Console from your
installation CD. If you have not yet installed Service Pack 2, you can first install the Recovery
Console and then install Service Pack 2.
6. In the Windows Setup message box that appears, click Yes to install the Windows
XP Professional Recovery Console. Windows Setup next attempts to contact
Microsoft and confirm that you have the latest version of Setup; it then installs the
Windows XP Recovery Console on your hard disk. Windows XP Professional then
displays a Windows XP Professional Setup message box indicating that the Windows
Recovery Console has been successfully installed.
7. Click OK to close the Microsoft Windows XP Professional Setup dialog box.
Exercise 2: Using the Recovery Console to Disable the Server Service
In this exercise, you start the Recovery Console and use the Help command to view the
available commands. You then use the Listsvc and Disable commands.
1. Restart your computer.
2. In the Please Select The Operating System To Start screen, select Windows Recovery
Console.
3. The Windows XP Recovery Console starts and prompts you to select which Windows
installation you want to log on to. If you had more than one Windows XP
Professional installation on this computer, all of them would be listed here. Type
1 and then press ENTER.
4. When prompted for the Administrator password, enter your password and press
ENTER.
5. At the prompt, type help and then press ENTER to see the list of available commands.
6. Scroll through the list of commands.
7. The Listsvc command allows you to view all the available services. Type listsvc
and press ENTER, and then scroll through the list of available services.
8. Press ESC to stop viewing services.
9. Type disable and press ENTER.
The Disable command allows you to disable a Windows system service or driver.
10. Type disable server and then press ENTER.
Recovery Console displays several lines of text describing how the Registry entry
for the Server service has been changed from Service_Demand_Start to
Service_Disabled. The Server service is now disabled.
11. Type exit and then press ENTER to restart your computer.
Exercise 3: Restarting the Server Service
In this exercise, you confirm that the Server service is disabled and then restart it.
1. Log on as Administrator.
2. Click Start, click All Programs, click Administrative Tools, and then click Computer
Management.
3. In the Computer Management window, expand Services And Applications.
4. Under Services And Applications, click Services.
5. Double-click Server.
6. In the Server Properties dialog box, change the Startup Type option to Automatic
and click OK.
7. Right-click Server and click Start.
8. Close the Computer Management window.
Showing posts with label XP Context. Show all posts
Showing posts with label XP Context. Show all posts
December 3, 2009


Install the Recovery Console
To install the Recovery Console, insert the Windows XP Professional CD-ROM into
your CD-ROM drive, and close the Windows XP Professional CD dialog box if it opens.
Open a Run dialog box or a Command Prompt window in Windows XP Professional,
and run the command drive:\i386\Winnt32.exe /cmdcons, where drive represents the
letter of the CD-ROM or network drive that holds the Windows XP installation files.
After installation, you can start the Recovery Console by choosing it from the list of
installed operating systems—you do not need to have the installation CD.
your CD-ROM drive, and close the Windows XP Professional CD dialog box if it opens.
Open a Run dialog box or a Command Prompt window in Windows XP Professional,
and run the command drive:\i386\Winnt32.exe /cmdcons, where drive represents the
letter of the CD-ROM or network drive that holds the Windows XP installation files.
After installation, you can start the Recovery Console by choosing it from the list of
installed operating systems—you do not need to have the installation CD.
How Will Start the Windows XP Professional Recovery Console
You can also run the Recovery Console from the Windows XP Professional CD-ROM
without installing it. The Recovery Console provides a limited set of administrative
commands that you can use to repair your Windows XP Professional installation. You
can use the following steps to start the Recovery Console from the Windows XP Professional
CD-ROM:
1. Insert the Windows XP Professional CD-ROM into the CD-ROM drive and restart
the computer. If your computer or the workstation you want to repair does not
have a bootable CD-ROM drive, you need to insert your Windows XP Professional
Setup Boot disk into your floppy disk drive. Insert the additional Windows XP Professional
Setup disks when you are prompted to do so.
2. When Setup displays the Setup Notification message, read it, and then press Enter
to continue.
3. Setup displays the Welcome To Setup screen. In addition to the initial installation
of Windows XP Professional, you can use Windows Setup to repair or recover a
damaged Windows XP Professional installation. Press R to repair a Windows XP
Professional installation.
4. The Windows XP Recovery Console screen appears. Press C to start the Recovery
Console.
5. If you have more than one installation of Windows XP Professional on the computer,
you are prompted to select which installation you want to repair. Type 1
and then press ENTER.
6. Type the Administrator’s password, and then press ENTER.
7. Setup displays a command prompt. Type help and then press ENTER for a list of
the commands available.
8. When you have completed the repair process, type exit and then press ENTER.
The computer will restart.
without installing it. The Recovery Console provides a limited set of administrative
commands that you can use to repair your Windows XP Professional installation. You
can use the following steps to start the Recovery Console from the Windows XP Professional
CD-ROM:
1. Insert the Windows XP Professional CD-ROM into the CD-ROM drive and restart
the computer. If your computer or the workstation you want to repair does not
have a bootable CD-ROM drive, you need to insert your Windows XP Professional
Setup Boot disk into your floppy disk drive. Insert the additional Windows XP Professional
Setup disks when you are prompted to do so.
2. When Setup displays the Setup Notification message, read it, and then press Enter
to continue.
3. Setup displays the Welcome To Setup screen. In addition to the initial installation
of Windows XP Professional, you can use Windows Setup to repair or recover a
damaged Windows XP Professional installation. Press R to repair a Windows XP
Professional installation.
4. The Windows XP Recovery Console screen appears. Press C to start the Recovery
Console.
5. If you have more than one installation of Windows XP Professional on the computer,
you are prompted to select which installation you want to repair. Type 1
and then press ENTER.
6. Type the Administrator’s password, and then press ENTER.
7. Setup displays a command prompt. Type help and then press ENTER for a list of
the commands available.
8. When you have completed the repair process, type exit and then press ENTER.
The computer will restart.
Create a Local User Account by Using Computer Management
To create local user accounts by using the Computer Management snap-in complete
the following steps:
1. From the Start menu, click Control Panel.
2. In the Control Panel window, click Performance And Maintenance.
3. In the Performance And Maintenance window, click Administrative Tools.
4. In the Administrative Tools window, double-click Computer Management.
Tip You can also access the Computer Management window by right-clicking the My Computer
icon on the desktop or Start menu and clicking Manage.
5. In the console tree of the Computer Management window, click the Computer
Management plus sign (+) icon to expand the tree. Computer Management contains
three folders: System Tools, Storage, and Services And Applications.
6. In the console tree, expand System Tools, and then click Local Users And Groups.
7. In the details pane, right-click Users, and then click New User.
8. Fill in the appropriate text boxes in the New User dialog box,click Create, and then click Close.
the following steps:
1. From the Start menu, click Control Panel.
2. In the Control Panel window, click Performance And Maintenance.
3. In the Performance And Maintenance window, click Administrative Tools.
4. In the Administrative Tools window, double-click Computer Management.
Tip You can also access the Computer Management window by right-clicking the My Computer
icon on the desktop or Start menu and clicking Manage.
5. In the console tree of the Computer Management window, click the Computer
Management plus sign (+) icon to expand the tree. Computer Management contains
three folders: System Tools, Storage, and Services And Applications.
6. In the console tree, expand System Tools, and then click Local Users And Groups.
7. In the details pane, right-click Users, and then click New User.
8. Fill in the appropriate text boxes in the New User dialog box,click Create, and then click Close.
How to Increasing Security by Using EFS
In this practice, you log on as an administrator and encrypt a folder and its files. You
then log on using a different user account, and attempt to open an encrypted file and
disable encryption on the encrypted file.
1. In Windows Explorer, create a folder named Secret on the C drive.
2. In the Secret folder, create a text file named SecretFile.txt.
3. Right-click the Secret folder, and then click Properties.
Windows XP Professional displays the Secret Properties dialog box with the General
tab active.
4. Click Advanced.
The Advanced Attributes dialog box appears.
5. Select the Encrypt Contents To Secure Data check box, and then click OK.
6. Click OK to close the Secret Properties dialog box.
The Confirm Attribute Change dialog box informs you that you are about to
encrypt a folder. You have two choices: You can encrypt only this folder, or you
can encrypt the folder and all subfolders and files in the folder
7. Select the Apply Changes To This Folder, Subfolders And Files option, and then
click OK.
8. Open the Secret folder.
9. What color is the SecretFile.txt text file? Why?
10. In the Secret folder, right-click the SecretFile.txt text file, and then click Properties.
The SecretFile.txt Properties dialog box appears.
11. Click Advanced.
The Advanced Attributes dialog box appears. Notice that the Encrypt Contents To
Secure Data check box is selected.
12. Close the Advanced Attributes dialog box.
13. Close the Properties dialog box.
14. Close all windows and log off.
15. Log on as User5.
16. In Windows Explorer, locate and open the SecretFile.txt text file.
17. What happens?
18. Close Notepad.
19. Right-click the SecretFile.txt text file, and then click Properties.
20. Click Advanced.
21. Clear the Encrypt Contents To Secure Data check box, and then click OK.
22. Click OK to close the SecretFile.txt Properties dialog box.
The Error Applying Attributes dialog box appears and informs you that access to
the file is denied.
23. Click Cancel.
24. Close all open windows and dialog boxes.
25. Log off.
then log on using a different user account, and attempt to open an encrypted file and
disable encryption on the encrypted file.
1. In Windows Explorer, create a folder named Secret on the C drive.
2. In the Secret folder, create a text file named SecretFile.txt.
3. Right-click the Secret folder, and then click Properties.
Windows XP Professional displays the Secret Properties dialog box with the General
tab active.
4. Click Advanced.
The Advanced Attributes dialog box appears.
5. Select the Encrypt Contents To Secure Data check box, and then click OK.
6. Click OK to close the Secret Properties dialog box.
The Confirm Attribute Change dialog box informs you that you are about to
encrypt a folder. You have two choices: You can encrypt only this folder, or you
can encrypt the folder and all subfolders and files in the folder
7. Select the Apply Changes To This Folder, Subfolders And Files option, and then
click OK.
8. Open the Secret folder.
9. What color is the SecretFile.txt text file? Why?
10. In the Secret folder, right-click the SecretFile.txt text file, and then click Properties.
The SecretFile.txt Properties dialog box appears.
11. Click Advanced.
The Advanced Attributes dialog box appears. Notice that the Encrypt Contents To
Secure Data check box is selected.
12. Close the Advanced Attributes dialog box.
13. Close the Properties dialog box.
14. Close all windows and log off.
15. Log on as User5.
16. In Windows Explorer, locate and open the SecretFile.txt text file.
17. What happens?
18. Close Notepad.
19. Right-click the SecretFile.txt text file, and then click Properties.
20. Click Advanced.
21. Clear the Encrypt Contents To Secure Data check box, and then click OK.
22. Click OK to close the SecretFile.txt Properties dialog box.
The Error Applying Attributes dialog box appears and informs you that access to
the file is denied.
23. Click Cancel.
24. Close all open windows and dialog boxes.
25. Log off.
How to Defragment a Hard Drive
1. Click Start, point to All Programs, point to Accessories, point to System Tools, and
then click Disk Defragmenter.
Windows XP Professional displays the Disk Defragmenter dialog box.
2. If there are multiple volumes on your computer, select C, and then click Analyze.
3. If Windows XP Professional displays a dialog box, indicating that there is no need
to defragment your volume at this time, click Close, and then read through Steps
6 through 12.
4. If Windows XP Professional displays a Disk Defragmenter dialog box, indicating
that you need to defragment your volume now, click View Report.
5. In the Analysis Report dialog box, scroll through the Volume Information box.
6. Scroll through the Most Fragmented Files box, and then click Save As.
Windows XP Professional displays the Save Defragmentation Report dialog box.
Notice that the default title for the report is VolumeC, and the default location for
the report is in the My Documents folder.
7. Click Save to save the report as VolumeC in the My Documents folder.
You are returned to the Analysis Report dialog box.
8. Click Defragment.
Disk Defragmenter defragments the volume. This process could take a long
time to complete, depending on the size of the volume and the amount of fragmentation.
9. Compare the Analysis Display with the Defragmentation Display.
10. Close Disk Defragmenter.
Leave the Local Disk (C:) Properties dialog box open for the next exercise.
then click Disk Defragmenter.
Windows XP Professional displays the Disk Defragmenter dialog box.
2. If there are multiple volumes on your computer, select C, and then click Analyze.
3. If Windows XP Professional displays a dialog box, indicating that there is no need
to defragment your volume at this time, click Close, and then read through Steps
6 through 12.
4. If Windows XP Professional displays a Disk Defragmenter dialog box, indicating
that you need to defragment your volume now, click View Report.
5. In the Analysis Report dialog box, scroll through the Volume Information box.
6. Scroll through the Most Fragmented Files box, and then click Save As.
Windows XP Professional displays the Save Defragmentation Report dialog box.
Notice that the default title for the report is VolumeC, and the default location for
the report is in the My Documents folder.
7. Click Save to save the report as VolumeC in the My Documents folder.
You are returned to the Analysis Report dialog box.
8. Click Defragment.
Disk Defragmenter defragments the volume. This process could take a long
time to complete, depending on the size of the volume and the amount of fragmentation.
9. Compare the Analysis Display with the Defragmentation Display.
10. Close Disk Defragmenter.
Leave the Local Disk (C:) Properties dialog box open for the next exercise.
How to Run Disk Cleanup
1. In the General tab of the Local Disk (C:) Properties dialog box, click Disk Cleanup.
A Disk Cleanup dialog box appears, indicating that it is calculating how much
space you can free on the C drive.
2. In the Files To Delete list box in the Disk Cleanup For (C:) dialog box, review the
files that Disk Cleanup is recommending you delete.
Security Alert If you started with a clean hard disk and installed Windows XP Professional
in Chapter 2, there might be few, if any, files that Disk Cleanup found to delete. If you
want to delete any files that Disk Cleanup recommends that you delete, make sure that the
files you want to delete are selected (a check mark is in the check box in front of the files),
and then click OK.
3. Click the More Options tab.
4. When would you use the options available in the More Options tab?
5. Click Cancel.
6. Close Disk Cleanup and all open windows.
A Disk Cleanup dialog box appears, indicating that it is calculating how much
space you can free on the C drive.
2. In the Files To Delete list box in the Disk Cleanup For (C:) dialog box, review the
files that Disk Cleanup is recommending you delete.
Security Alert If you started with a clean hard disk and installed Windows XP Professional
in Chapter 2, there might be few, if any, files that Disk Cleanup found to delete. If you
want to delete any files that Disk Cleanup recommends that you delete, make sure that the
files you want to delete are selected (a check mark is in the check box in front of the files),
and then click OK.
3. Click the More Options tab.
4. When would you use the options available in the More Options tab?
5. Click Cancel.
6. Close Disk Cleanup and all open windows.
November 10, 2009
Disable Error Reporting From Your PC
 Whenever an application suffers from an error, and is closed down by the system or by you, the Microsoft Error Reporting feature will pop up, asking you if you want to send a report about the problem to Microsoft.
As I have reported previously, there are some privacy concerns with this.
Windows allows you to customize the way Error Reporting works. Open the System applet from Control Panel, and select the Advanced tab. Near the bottom, click the Error Reporting button.
You can enable or disable Error Reporting, or when you leave it enabled, you can specify which programs you want to exclude from this feature.
Customize Error Reporting

As I have reported previously, there are some privacy concerns with this.
Windows allows you to customize the way Error Reporting works. Open the System applet from Control Panel, and select the Advanced tab. Near the bottom, click the Error Reporting button.
You can enable or disable Error Reporting, or when you leave it enabled, you can specify which programs you want to exclude from this feature.
Display Administrator Account on Welcome Screen at Start Time
By default, the Administrator account is not displayed on the Welcome Screen. To log in to the Administrator account, press Ctrl+Alt+Del, release the Del key, and press it again, while still holding down the Ctrl+Alt keys. This will change the Welcome Screen login to the Windows 2000 style log in, where you can now type Administrator and the password for the Admin account.
You could also add the Administrator to the Welcome Screen:
1. Start the Registry Editor
2. Go to HKEY_LOCAL_MACHINE \ SOFTWARE \ Microsoft \ Windows NT \ CurrentVersion \ Winlogon \ SpecialAccounts \ UserList \
3. Right-click an empty space in the right pane and select New > DWORD Value
4. Name the new value Administrator
5. Double-click this new value, and enter 1 as it's Value data
6. Close the registry editor .
You could also add the Administrator to the Welcome Screen:
1. Start the Registry Editor
2. Go to HKEY_LOCAL_MACHINE \ SOFTWARE \ Microsoft \ Windows NT \ CurrentVersion \ Winlogon \ SpecialAccounts \ UserList \
3. Right-click an empty space in the right pane and select New > DWORD Value
4. Name the new value Administrator
5. Double-click this new value, and enter 1 as it's Value data
6. Close the registry editor .
Hide Users on the Welcome Screen From Your PC
When you add an account for certain users with Windows XP, their user names will appear on the Welcome Screen. Sometimes a user needs to be added to a Windows XP machine, because the user needs access (via the network) to resources on the machine, but the user will not be physically logging in on the computer. You can remove this user name from the Welcome Screen, while still maintaining the user account.
1. Start the Registry Editor
2. Go to HKEY_LOCAL_MACHINE \ SOFTWARE \ Microsoft \ Windows NT \ CurrentVersion \ Winlogon \ SpecialAccounts \ UserList \
3. Right-click an empty space in the right pane and select New > DWORD Value
4. Name the new value exactly as the Username
5. Leave the Value data as 0
6. If you want to enable this user again on the Welcome Screen, either double-click the Username value, and change the Value data to 1, or delete the Username
7. Close the registry editor
1. Start the Registry Editor
2. Go to HKEY_LOCAL_MACHINE \ SOFTWARE \ Microsoft \ Windows NT \ CurrentVersion \ Winlogon \ SpecialAccounts \ UserList \
3. Right-click an empty space in the right pane and select New > DWORD Value
4. Name the new value exactly as the Username
5. Leave the Value data as 0
6. If you want to enable this user again on the Welcome Screen, either double-click the Username value, and change the Value data to 1, or delete the Username
7. Close the registry editor
Use the Hibernate Option
The hibernate feature saves everything in memory on your hard disk, turns off your monitor and hard disk, and then turns off your computer. When you restart your computer, your desktop is restored exactly as you left it.
Typically, you put your computer in hibernation when you will be away from the computer for an extended time or overnight. When you restart the computer, your desktop is restored exactly as you left it.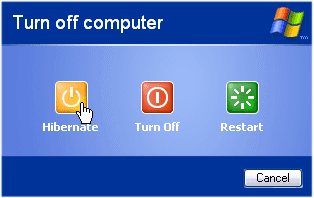
To put your system in hibernate, press Turn Off Computer on the Start menu, and on the next window, put your cursor over the Stand By button. Now press the Shift key on your keyboard. Stand By will change to Hibernate.
To use Windows Power Options, you must have a computer that is set up by the manufacturer to support these features. For more information, see the documentation that came with your computer.
What you need to know is that if hibernate is enabled on your computer, a hidden file hiberfill.sys is created in the root of your system drive (usually C:\), which is around the same size as your system's memory (RAM). You can't move this file to another drive, it has to be in the root of your system drive. If you don't use hibernate, you can remove this file by going to the Power Options in Control Panel, and on the Hibernate tab un-check Enable hibernation
Typically, you put your computer in hibernation when you will be away from the computer for an extended time or overnight. When you restart the computer, your desktop is restored exactly as you left it.

To put your system in hibernate, press Turn Off Computer on the Start menu, and on the next window, put your cursor over the Stand By button. Now press the Shift key on your keyboard. Stand By will change to Hibernate.
To use Windows Power Options, you must have a computer that is set up by the manufacturer to support these features. For more information, see the documentation that came with your computer.
What you need to know is that if hibernate is enabled on your computer, a hidden file hiberfill.sys is created in the root of your system drive (usually C:\), which is around the same size as your system's memory (RAM). You can't move this file to another drive, it has to be in the root of your system drive. If you don't use hibernate, you can remove this file by going to the Power Options in Control Panel, and on the Hibernate tab un-check Enable hibernation
Create a Password Recovery Disk in Your PC
If you want some added safety in case you forget your password, you should create a Password Recovery Disk. To do so, open User Accounts from the Control Panel. Select the account for which you want to create a Password Recovery Disk; this will put you in the change 'mode'. From the Related Tasks at the left side, choose Prevent a forgotten password and follow the wizard to create a Password Recovery Disk.
If you upgraded from Windows NT or 2000, you will need to create new disks. The old disks you created on the previous OS version won't work.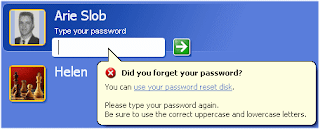
When you ever forget your password, you can press the and you will see a link to use your Password Recovery Disk. This will verify your access rights, and prompt you to create a new password, which you can use to access your account. The new password is written to your recovery disk at the same time you create it.
If you upgraded from Windows NT or 2000, you will need to create new disks. The old disks you created on the previous OS version won't work.

When you ever forget your password, you can press the and you will see a link to use your Password Recovery Disk. This will verify your access rights, and prompt you to create a new password, which you can use to access your account. The new password is written to your recovery disk at the same time you create it.
Remove Shared Documents Folder from Your Computer
If your computer is part of a Workgroup, you will notice that a Shared Documents folder appears in My Computer. This folder lets you share files with multiple users easily. If you want to remove this folder you can:
1. Start the Registry Editor
2. Go to HKEY_CURRENT_USER \ Software \ Microsoft \ Windows \ CurrentVersion \ Policies \ Explorer \
3. Right-click an empty space in the right pane and select New > DWORD Value
4. Name the new value NoSharedDocuments
5. Double-click this new value, and enter 1 as its Value data
6. Close the registry editor
7. Log off, or restart Windows for the changes to take effect
To reverse this process, change the Value data to 0, or delete the NoSharedDocuments Value.
1. Start the Registry Editor
2. Go to HKEY_CURRENT_USER \ Software \ Microsoft \ Windows \ CurrentVersion \ Policies \ Explorer \
3. Right-click an empty space in the right pane and select New > DWORD Value
4. Name the new value NoSharedDocuments
5. Double-click this new value, and enter 1 as its Value data
6. Close the registry editor
7. Log off, or restart Windows for the changes to take effect
To reverse this process, change the Value data to 0, or delete the NoSharedDocuments Value.
Adjust the Size Of Thumbnails to your PC
There's an easy way to change the size of the thumbnails that are used in Windows Explorer's thumbnail view:
1. Start the Registry Editor
2. Go to HKEY_CURRENT_USER \ Software \ Microsoft \ Windows \ CurrentVersion \ Explorer \
3. Right-click an empty space in the right pane and select New > DWORD
4. Name the new value ThumbnailSize
5. Double-click this new value, and enter a value between 32 and 96 (hexadecimal)*
6. Close the registry editor
*) There have been information that the value can go up to 256 (hexadecimal), but I have not been able to set this value over 96 on my system. Frankly I doubt if higher values are indeed possible: 96 hex is already 150 (pixels) decimal. A thumbnail of 256 hex would be 598 pixels wide!
To return to the default, just delete the ThumbnailSize value.
The registry hack above will change the settings for the current user only. To change them for all users, add the key to HKEY_LOCAL_MACHINE \ Software \ Microsoft \ Windows \ CurrentVersion \ Explorer \ (you'll need administrative privileges to do this).
1. Start the Registry Editor
2. Go to HKEY_CURRENT_USER \ Software \ Microsoft \ Windows \ CurrentVersion \ Explorer \
3. Right-click an empty space in the right pane and select New > DWORD
4. Name the new value ThumbnailSize
5. Double-click this new value, and enter a value between 32 and 96 (hexadecimal)*
6. Close the registry editor
*) There have been information that the value can go up to 256 (hexadecimal), but I have not been able to set this value over 96 on my system. Frankly I doubt if higher values are indeed possible: 96 hex is already 150 (pixels) decimal. A thumbnail of 256 hex would be 598 pixels wide!
To return to the default, just delete the ThumbnailSize value.
The registry hack above will change the settings for the current user only. To change them for all users, add the key to HKEY_LOCAL_MACHINE \ Software \ Microsoft \ Windows \ CurrentVersion \ Explorer \ (you'll need administrative privileges to do this).
Try To Keep RAS Connections Alive When Switching Users
You might have noticed that when you use the "Switch User" feature of Windows XP, you will lose your RAS (Dial-up and/or certain xDSL connections) connection. You can avoid this by entering the following to your registry:
1. Start the Registry Editor
2. Go to HKEY_LOCAL_MACHINE \ SOFTWARE \ Microsoft \ Windows NT \ CurrentVersion \ Winlogon
3. Right-click an empty space in the right-hand pane, and from the menu select New > String value
4. Name the new value KeepRASConnections
5. Right-click the KeepRASConnections value, and choose Modify from the menu
6. Enter 1 as the Value data
7. Close the registry editor and log off from Windows for the changes to take effect
Next time you switch user (Start > Log Off > Switch User), you won't lose your connection!
1. Start the Registry Editor
2. Go to HKEY_LOCAL_MACHINE \ SOFTWARE \ Microsoft \ Windows NT \ CurrentVersion \ Winlogon
3. Right-click an empty space in the right-hand pane, and from the menu select New > String value
4. Name the new value KeepRASConnections
5. Right-click the KeepRASConnections value, and choose Modify from the menu
6. Enter 1 as the Value data
7. Close the registry editor and log off from Windows for the changes to take effect
Next time you switch user (Start > Log Off > Switch User), you won't lose your connection!
Add "Copy to Folder" and "Move to Folder" to Explorer Context Menu For Better Use
 You can add "Copy to Folder" and "Move to Folder" to the Explorer context menu, so when you right-click a file or folder in Explorer, you have the option to Copy or Move it to another folder.
 - Start the Registry Editor
- Go to HKEY_CLASSES_ROOT \ AllFilesystemObjects \ shellex \ ContextMenuHandlers \
- Right-click the ContextMenuHandlers entry, and from the menu select New > Key
- Name the new key Copy To
- Repeat step 3, but this time for the name (step 4) choose Move To
- Change the (Default) string value found in the Copy To key to {C2FBB630-2971-11D1-A18C-00C04FD75D13}
- Change the (Default) string value found in the Move To key to {C2FBB631-2971-11D1-A18C-00C04FD75D13}
- Close the registry editor


